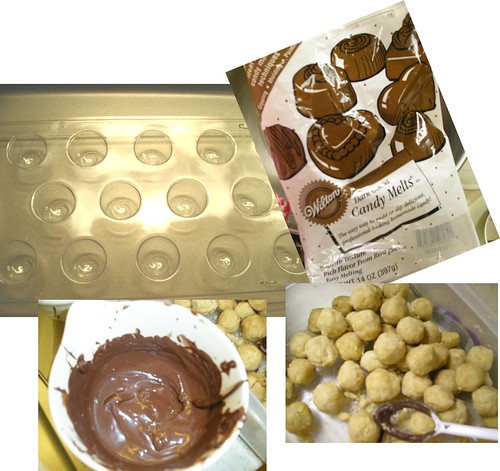
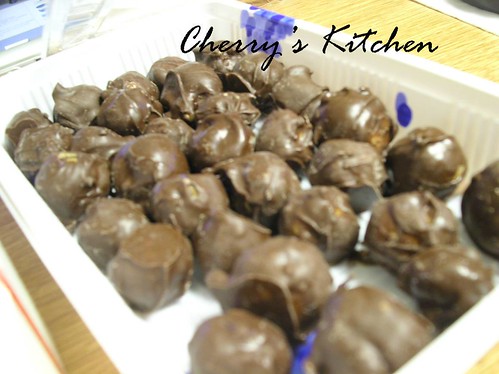
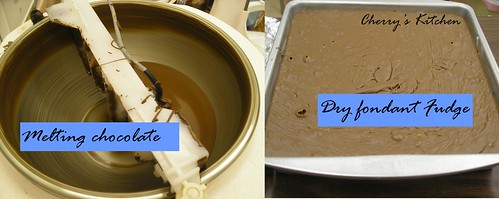
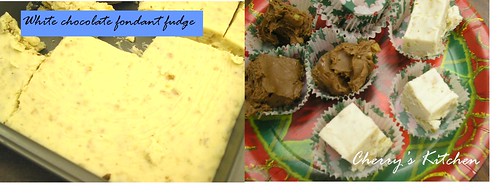
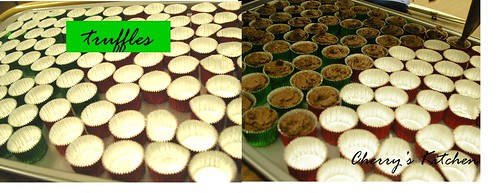
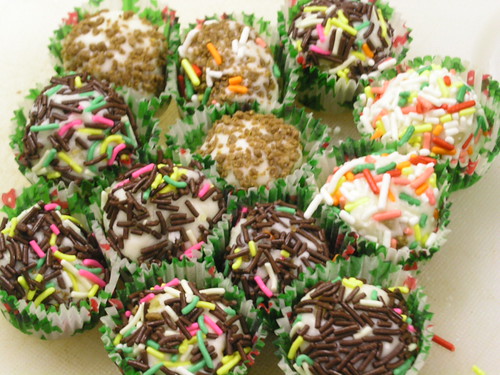
I made truffles using the Dry fondant fudge recipe that was posted earlier. However, I made some adjustments....rolling them into balls and coating it with caramel crunch, chocolate bits and chopped almonds.
Let me explain a little more about the ingredients since I didn't do it last time.
-Dry fondant looks like icing sugar, made of candy fondant sugar. This is usually used for candies in hand-rolled cream center, cordials, cast creams.
-Invertase is a yeast derived enzyme that splits sucrose to give glucose and fructose (invert sugar). It helps to increase shelf life and is used in any inversion of sucrose esp liquefied cherry centers, creams, mints, truffles, marshmallow, invert sugar, fondants.
-Invert sugar works similarly to honey.
-Corn syrup discourage discolorization. (like vinegar, cream of tartar, lemon juice)
note: I would reduce the sugar (corn syrup and invert sugar) by 1/2 as its a little sweet)
**these ingredients are pretty hard to find but the result is melt-in-the-mouth fudge that's irressisable**
12.20.2006
12.14.2006
All-occasion downy yellow butter cake
Since I'm currently taking the Wilton cake decorating class 2x/week, I'm really into the 'cakey' mood. I've been baking cakes from scratch to bring it to the class for decoration practice.
On page 30 of the Cake bible, Rose gave a very convincing description of why this cake is her fave. "If I had to choose among all my cakes, this one would win first place because it is delicious by itself yet versatile enough to accommodate a wide range of buttercreams. The cake combines the soft texture of white cake with the buttery flavor of yellow cake. Using of yolks instead of whole eggs produce a rich yellow color, fine texture, and delicious flavor. "
With this description, who wouldn't want to check this out!
Ingredients:
6 large egg yolks
milk 1 cup ( I used Silk soy milk)
vanilla ( 21/4 t)
sifted cake flour, 3 cups
sugar, 1 1/2 cups ( I used 1 cup)
baking powder, 1T + 1 t
salt, 3/4 t
unsalted butter, 12 T ( must be softened)
Directions:
1. Preheat oven to 350F
2. In a medium bowl, combine the yolks, 1/4 cup milk and vanilla.
3. In a large mixing bowl, combine the dry ingredients and mix on low speed for 30 sec to blend. Add butter and remaining 3/4 c milk. Mix on low sped until the dry ingredients are moistened. Increase to high speed ( for hand mixers) and beat 1 1/2 min to aerate and develop cake structure. Scrape down the sides. Gradually add the egg mixture in 3 batches, beating 20 seconds after each addition to incorporate the ingredients and strengthen the structure. Scrape down the sides.
4. Scrape the batter into prepared pans and smooth the surface with spatula. ( pan will be 1/2 full).
5. Bake 25-35 mins. THe cake should shrink from the sides of the pan only after removal from the oven.
Store: 2 days room temperature, 5 days refrigerated, 2 months frozen.
Texture is most perfectly moist the same day as baking.
Complementary adornments: A simple dusting of powdered sugar, buttercream, glaze or fondant.
Evaluation:
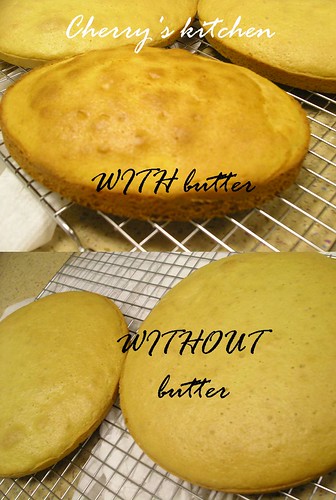
I really like this cake! And I have to admit that I made a huge mistake by not adding butter! *opps** After putting the pan into the oven, I felt that something was wrong although I could not pin-point what was wrong. It was several minutes later that I realized butter was not added. *embarrassed red face* I rushed to open the oven door to find the cake cooking and rising well. Since the equipments were not washed, I hesitatingly made another batch. Glad I did. *_^ Otherwise, I'd not realize how nice this cake is. ;p
At Wilton cake class 1, lesson 2...something we did
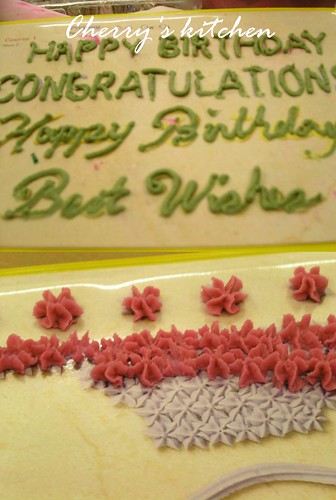
And finally, practicing on the cake...
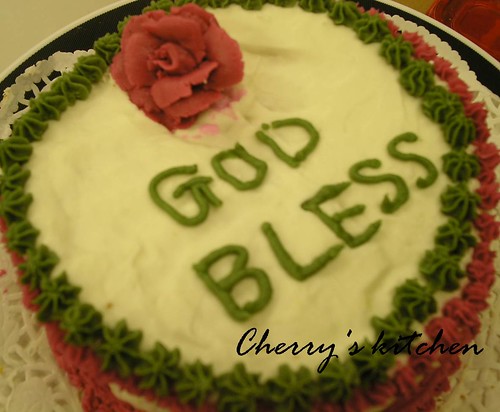
Wilton Cake decorating class 2: final product that I didn't post up earlier...
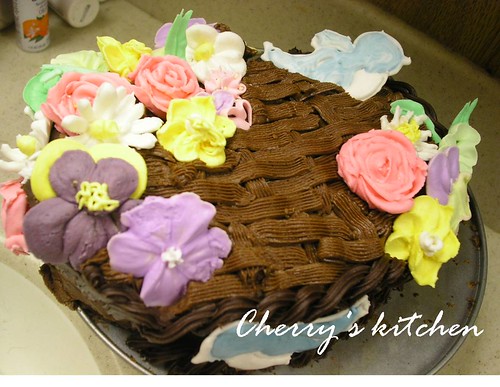
12.12.2006
Genoise classique
Pronounced as "JenWAHZ ClassEEK." Genoise is a European sponge-type cake which differs from American sponge in that it contains melted butter to partially tenderize and flavor it and much less sugar. When compared to a basic butter cake, genoise uses double the egg, half the sugar, flour, butter and no chemical leavening or added liquid. This explains why genoise is "lighter than air!"
Replacing some of the flour with cornstarch tightens the grain and holds the moisture supplied by the eggs and sugar.
Genoise is usually moistened with syrup. However, for this, i did not add syrup. Adapted from The Cake Bible... which is the ultimate cake book I'll ever need. ;p I'm giving step-by step directions so that anyone can bake this easily. It not a straight-forward cake so I'd not recommend this for beginners.
Ingredients:
1. clarified beurre moisette, 3 T ( if you do not have clarified butter on hand, you will need to clarify 4T unsalted butter. In a heavy saucepan melt the butter over medium heat. When the butter looks clear, cookuntil the solids drop and begin to brown. Pour through a cheesecloth. However, for convenience sake, I simply put it into the micrwave and set it on high at several intervals until melted)
2. vanilla, 1 t
3. sugar, 1/2 cup
4. sifted cake flour, 1/2 cup
5. cornstarch, 1/2 cup - 1 T
syrup: sugar 1/4 cup + 1 1/2 t, water, 1/2 cup
Directions:
1. Preheat oven to 350F
2. Warm the beurre noisette until almost hot (110F). Add vanilla and keep warm
3. Heat a pot of hot water. In a mixing bowl, place it in the hot water and heat the eggs and sugar until lukewarm, stirring constantly to prevent curdling.
4. Using the whisk beater, beat the mixture on high speed for 5 mins or triple in volume. ( 10 mins for hand beaters)
5. Sift flour and cornstarch
6. Remove 1 scant cup of egg mixture, and thoroughly whisk into beurre noisette.
7. Sift 1/2 flour mixture over the remaining egg mixture and fold it in gently but rapidly with a large spatula until almost all flour hsa disappeared.
8. Repeat with the remaining flour mixture until the flour has disappeared compltely. Fold in the butter mixture until just incorporated.
9. Pour immediately into prepared pan and bake 25-35 mins. Once cake shrinks slightly from the sides, it is done. Lossen the sides of cake with spatula and unmold at once onto a rack.
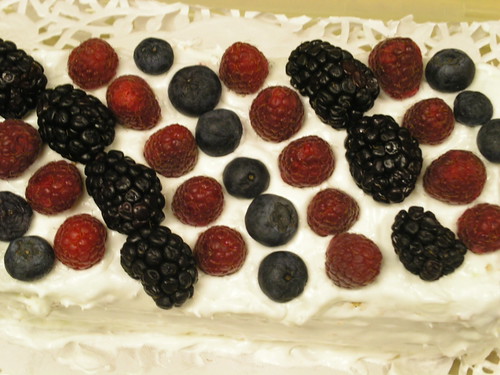
This picture shows a frosted genoise classique. I coated it with a mixture of buttercream icing and nondairy fat free whipped cream. ^_*
12.11.2006
Jia lei's banana cake
This banana cake is from Jia lei's recipe book. I have been making several 'banana' products because 1. Bananas are abundant and 2. want to find out how each recipe turn out 3. its a good breakfast item
Evaluation:
This cake is dense with a strong banana taste. It should be eaten on its own, without cream or icing i.e. it can't be a birthday cake base because of its heavy texture. ( reminds me a little of 'kueh') I cut it into little pieces to enjoy as I think it taste better taking mini bites.
Ingredients:
150 g sugar
400g banana
4 eggs
140 g melted butter
1 tsp baking powder
210g flour
Method:
1. Sieve flour and baking powder together
2. Cream sugar, bananas for 1 min. until light and fluffy. Add eggs in, beat 2 min and cream until light. Pour in melted butter. Mix well.
3. Fold in sifted flour, mix well and pour into a 8 in cake tin and bake for 80 mins at 356F (180C). Temperature varies.
12.08.2006
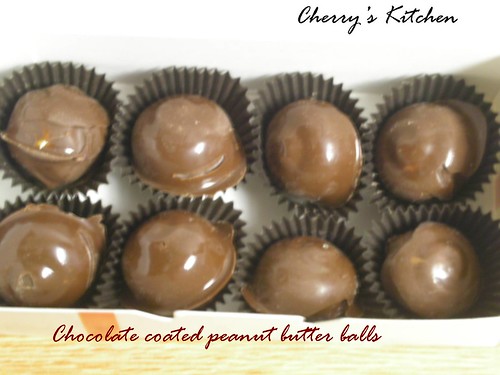
chocolate coated peanut butter balls
I woke up this morning feeling excited to try the peanut butter balls I made last night. As usual, I had my glass of warm water. But this time, before eating fruits, I popped in the PB ball and OMgoodness!! its SO good. Really!! Sally had this on her recipe list and it seemed easy enough to try out. I googled a search on it but eventually settled on her recipe. Seriously, if you're a peanut butter and chocolate person, this is something you've got to eat!
Open this box......to get:::: --->
:::Ingredients:::
1 cup peanut butter ( i eye-balled 8 tablespoons full)
1 cup butter ( 1 stick, used 1/3 fat)
1 T vanilla
1 1/2 cup rice krisp
Powdered sugar ( she said 1 pound but i used appx 10 oz)
Chocolate candy melts, 14 oz
::::Directions:::
1. Mix peanut butter, butter and vanilla well.
2. Add rice krisp
3. Add powdered sugar slowly. Mix well. Mixture wil resemble crumbs.
4. Roll into balls. It must be really tiny, about 3/4 inch. The smaller the better. Shape it real round, trying to make it all the same size.
5. Microwave chocolate candy melts. I had to do this in batches because the chocolate hardens quickly. Aproximately 4 oz in a bowl. Microwave on high for 30 seconds. Stir. Microwave on high again for 30 seconds. Stir to melt.
6. Dip the balls into the melted chocolate and lay it on foil to dry. OR place it on a rounded bon bon mold to get the rounded shape. Use a paint brush to make the top of chocolate smooth.
7. Place it in the fridge ( or freezer) and within minutes, you're ready to eat your PB balls!
8. Put into paper cups or nicely on a tray. Or in bags as gifts.
Enjoy!
12.06.2006
Dry Fondant Fudge: white and dark chocolate
s{Easy old-fashioned flavor fudge with a very rich chocolate taste}
There are many recipes out there but are they good? Someone was just sharing that she found this recipe online that stated, "absolutely delicious recipe from grandma' but when she tried it, it was horrible and had to be thrown away...
That is why I like recipes from amateurs or reliable sources!!! ^_^
This recipe is definitely one that is excellent!
She's the ownder of a cake decorating store and has won numerous cake decorating competitions and has even acted as a judge at major cake decorating competitions a few times before!
As she said, there are politics everywhere...she shared an incident of how one applicant who made a roller-coaster cake got second place because another person, who made a cathedral, needed the money more than the other. She did not know about it until later and was very upset. "The roller coaster cake is absolutely fabulous,' she said and 'was made using cans to hold the roller coaster up when it was drying.' The cathedral, on the other hand, was easy to make as it only involved measurement and placing it together.
Ingredients:
6 1/2 cups dry fondant (2 pounds, 32 oz)
1 cup evaporated milk
1/2 t salt
2 T invert sugar
1/2 t invertase
2 t corn syrup
1/2 c butter
1 lb dark chocolate or white chocolate
1 t vanilla
1/2 cup marshmallow cream
1 c black or english walnuts
Directions:
Combine findant, milk, salt, sugar and syrup in a double boiler or heavy saucepan over very low heat. Heat to 175-180 degrees, stirring occasionally. Remove from heat, add butter and baking chocolate. Mix until completely blended. Add vanilla, marshmallow cream, and nuts. Mix together well; spread in buttered 9 x 13 inch pan. When cooled, cut into squares.
Truffles
{{every bite of this truffle is filled with rich, unsurpassed goodness}}
This is a good recipe to try out if you'd like to make truffles.
~ straightforward and easy~
Ingredients:
2 1/2 cup (3/4 pound) finely chopped real chocolate
1 cup heavy cream (heavy whipping cream)
1/4 t salt
1/4 t vanilla
1/2 t invertase (opt)
Antioxidant artificial (opt)
Instructions:
1.Whip cream until it holds a soft peak. (Use the whisk tip, start slowly, gradually increasing speed. 'soft' like icing) Add salt, vanilla and antioxidant artificial.
2. Melt milk chocolate
3. Cool to 98
4. Add warm chocolate, a little at a time, to whipped cream, stirring vigorously with a spoon. ( You want it to be fluffy, do not overbeat )
5. Pack mixture into pastry bag filled with a coupler without the ring. Squeeze out mounds of truffle mixture onto parchment mat. Chill mounds in the refrigerator for several hours. Pat down any peaks after truffles have been in the refrigerator a short time.
~~~~
For molded truffles:
Pack mixture into a pastry bag. Melt candy coating or melt and temper chocolate. Line your mold using a squeeze bottle. Let chocolate set up at room temp. Fill the lined mold 3/4 full with the truffle mixture. Cover the truffle mixture with chocolate. Place in freezer. When the mold is cloudy and the candy feels cold, invert the mold and candy will drop from the mold.
~~~~
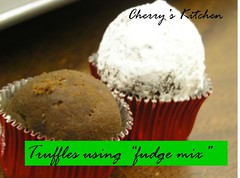
Truffles using the Fudge-mix method:easy!
Use the Dry Fondant Fudge recipe to make the fudge. Shape into balls. Coat with powdered sugar or cocoa.
*EDIT: Made truffles again for 2009 Christmas with slight variations: Check it out...
12.04.2006
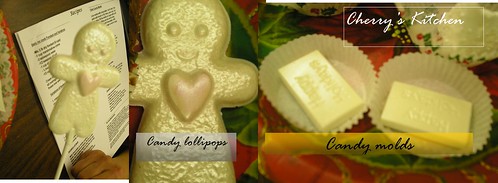
Candy molds
Here's another "christmas-y" idea recipe for your enjoyment...
Doesn't it look cute and professional?
BUT...It's so simple!. *_^
The only difficulty might be finding the nice kinds of mold or equipments?.Once you have the stuff, bang, its easy!
Hmm..maybe I should post up another blog on the stuff to buy or needed to make it?
Place the white chocolate into a plastic bottle (used for candy making).
Melt it in microwave or place bottle in warm water.
Squeeze it out into the mold. Refrigerate it for a several minutes.
Remove.
Paint it with gel or coat with lustered sugar (opt.)
Place in cute paper cups.
Place the white chocolate into a plastic bottle (used for candy making).
Melt it in microwave or place bottle in warm water.
Squeeze it out into the mold. Refrigerate it for a several minutes.
Remove.
Paint it with gel or coat with lustered sugar (opt.)
Place in cute paper cups.
*The above picture was made with silver lustered sugar. Pink lustered sugar was used for the heart. If you do not have lustred sugar, plain white chocolate looks good too. ;p
*There are various types of molds that you can buy to suit the specific occassion. For example, the above has the words, "Happy Holidays" on it.
Chocolate dips: ideas
Sally's chocolate dip recipe is awesome and simple. ^_^
Some ideas --->
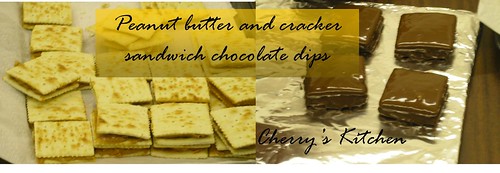
1. peanut butter and cracker sandwich
2. Large or small pretzels
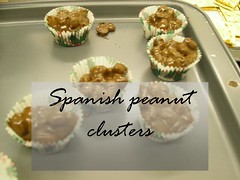
3. Spanish peanut clusters
4. Raisin clusters
*Put into candy cups to keep small sizes.
Peanut butter and cracker sandwich:
1. peanut butter and cracker sandwich
2. Large or small pretzels
3. Spanish peanut clusters
4. Raisin clusters
*Put into candy cups to keep small sizes.
Peanut butter and cracker sandwich:
Slap peanut butter between the two saltine crackers. Dip the sandwich into melted chocolate candy, letting the chocolate slip over. Place onto foil board. Cool in fridge for a few minutes.
Spanish peanut clusters:
Add peanuts into melted chocolate candy. Mix well. Eye-ball the amount of peanuts to chocolate ratio. Spoon into paper cups. That's it!!
*If chocolate becomes harden in the process of spooning, put the mixture into the microwave for few seconds.
Peppermint bark
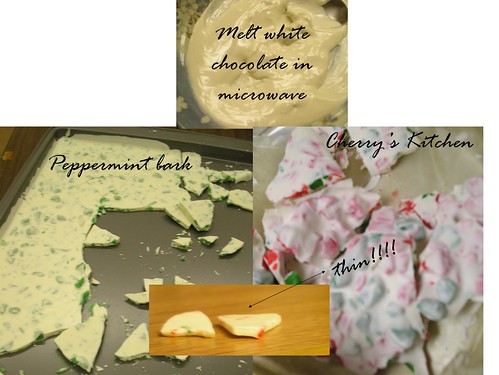
It's normally sold during Christmas. However, you can make it on your own...it's really easy to make + cheaper!!
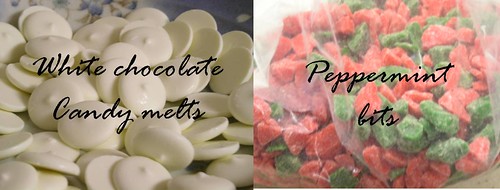
1. Melt white chocolate candy melts in glass bowl.
2. Add peppermint crunch to melted chocolate
3. Spread a THIN layer on a cookie sheet.
4. Put in freezer
5. Break into serving size pieces
Note:
1. Do not use the regular white chocolate- has to be for candy coating type
2. Thin layer, about 1 cm- b/c thin taste better than thick
3. It's better to put it in the freezer than regfrigerator because it gives a shiny luster.
4. Add less crunch. The 'syrupy' mixture has to have a 'runny' texture that can be poured onto the tray.
Variations: - Can use almonds, flavoring, color to marble- two color swirl.
roasted fennel with parmesan
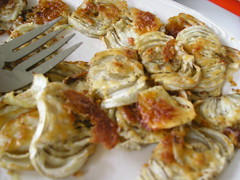
Fennel is one of those vegetables that is underappreciated. It is delicious if you know how to cook it. This recipe was featured on Giada's show at the Food Network channel.
Raw, it has a licorice flavor and a celerylike texture that is very refreshing, but it's also delicious as a cooked vegetable. The licorice flavor mellows a but and is a great match for salty Parmesan. At first look and taste, one might think that its roasted onions.
This is one sure-win fennel recipe that you will love. :)
4 T olive oil, plus more for baking dish
4 fennel bulbs, cut horizontally into 1/3 inch thick slices, fronds reserved
salt and freshly ground pepper
1/3 cup freshly shredded parmesan cheese
Preheat the oven to 375F. Lightly oil a 13 x 9 x 2-inch glass baking dish. Arrange the fennel in the dish. Sprinkle with salt and pepper, then with the parmesan cheese. Drizzle with the oil. Bake until the fennel is fork-tender and golden brown, about 45 minutes. Chop enough fennel fronds to equal 2 Tablespoons, then sprinkle over the roasted fennel and serve.
Subscribe to:
Posts (Atom)
Disclaimer: All the recipes posted are for my personal references and/or adapted from mentioned instructors or books. They/I reserve the rights to it. Please remember to cite your sources! Thank you.